How to Add a Back to Top Button in WordPress

Have you ever gotten lost reading a blog because it's was just too good to stop? You get to the bottom of a long post and realized it's a long way back up.
If you want to make it easier for your readers to use your website or blog, this tutorial will show you how to add a Back to Top button to your WordPress site. They'll secretly be thanking you for making it easier to navigate your site!
Install WPFront Scroll Top Plugin
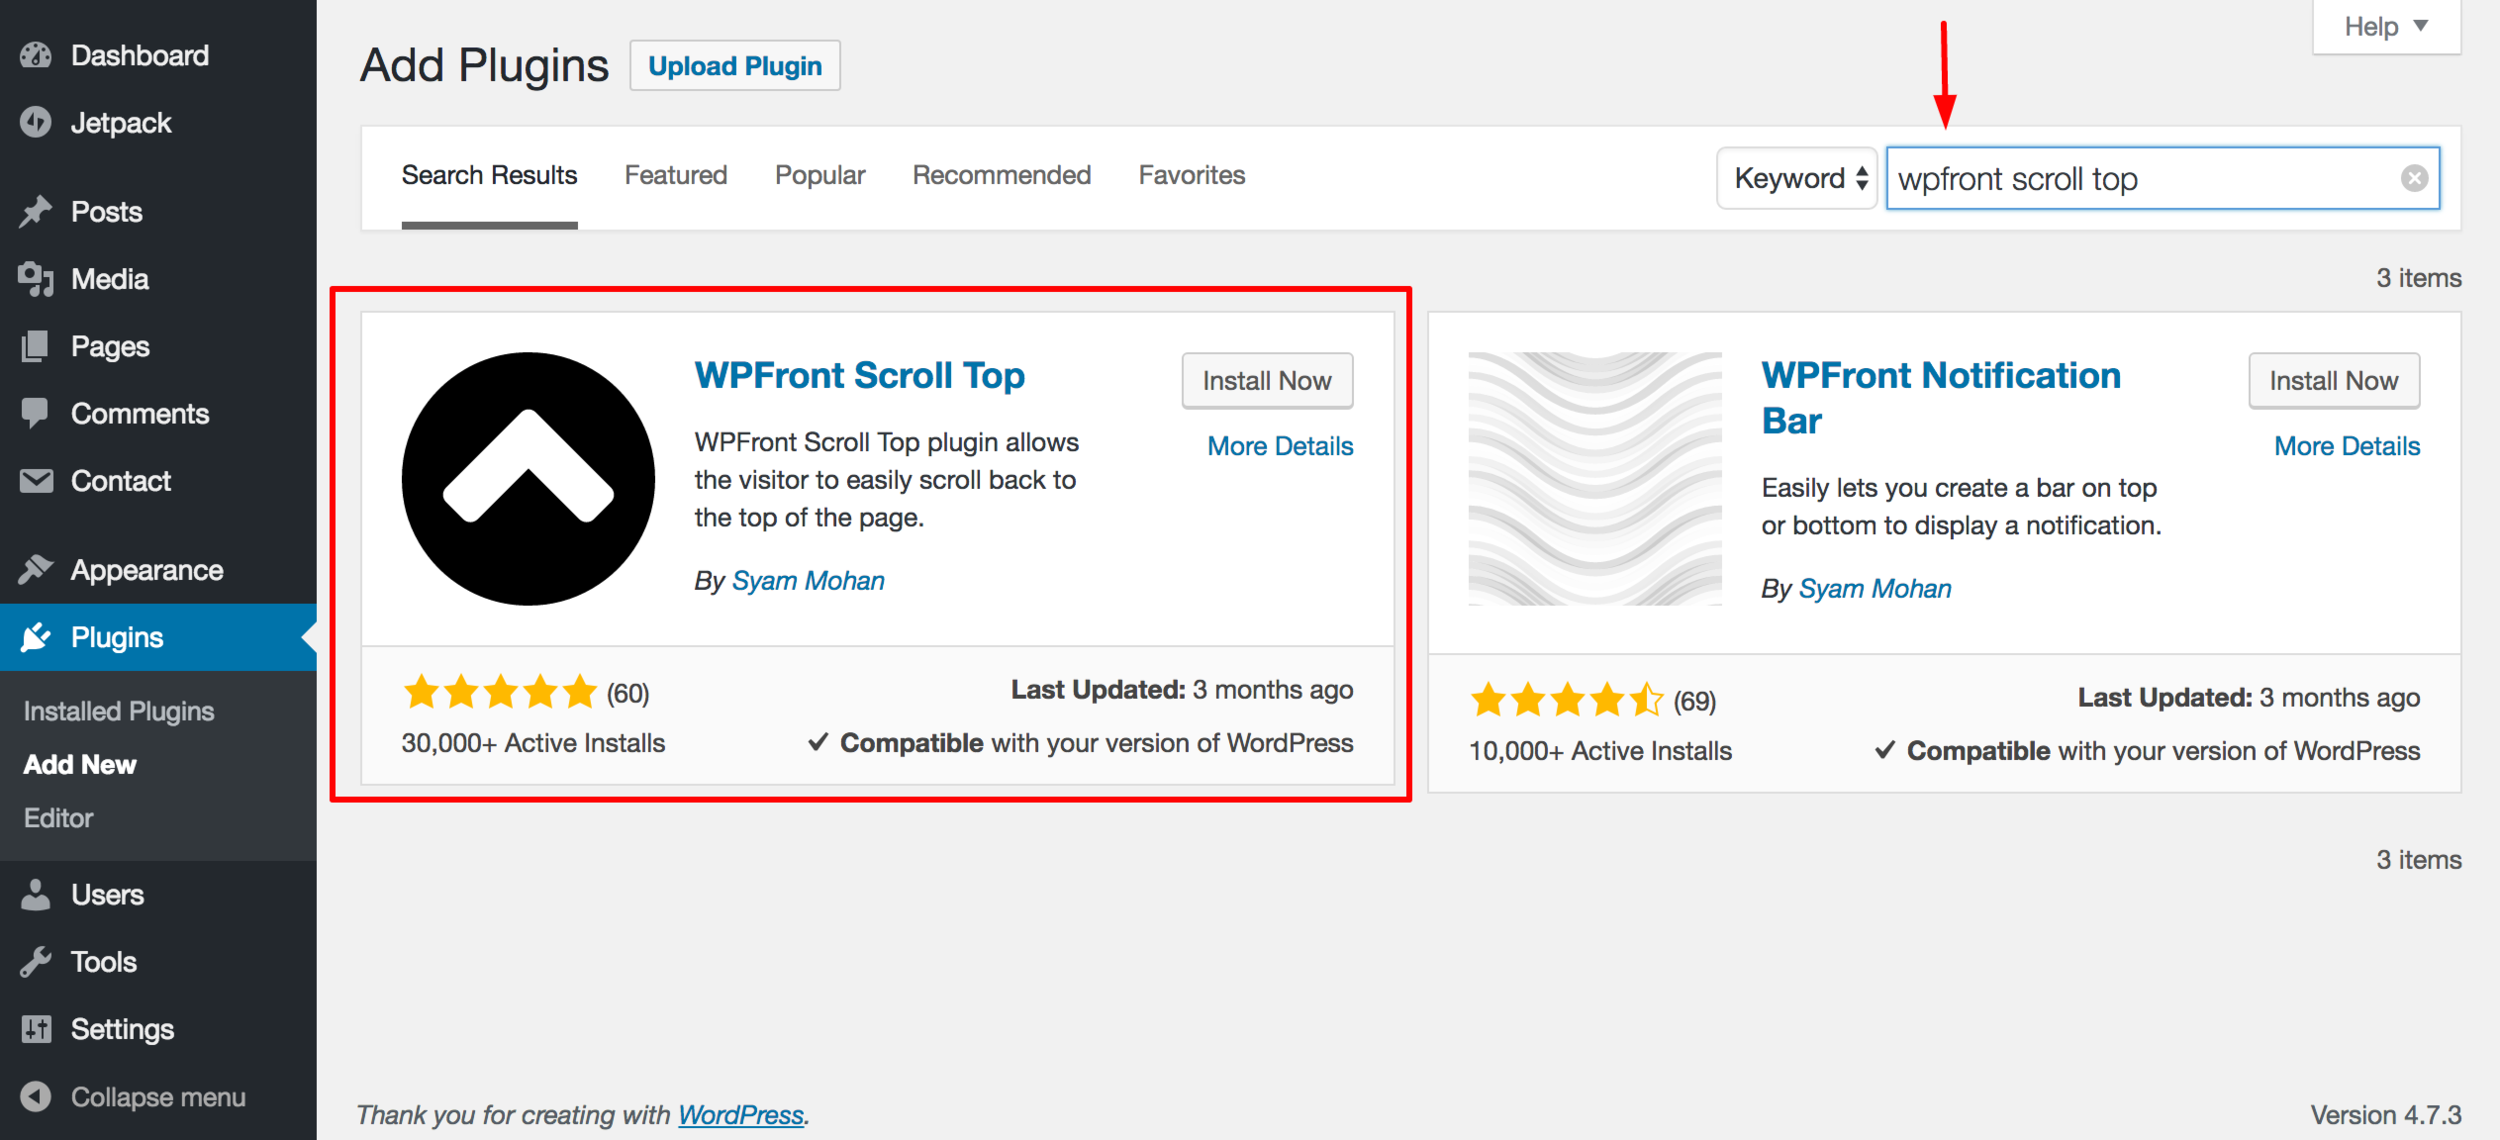
The first thing you need to do is install and activate the WPFront Scroll Top Plugin. From your WordPress dashboard go to Plugins > Add New and search for the "wpfront scroll top" plugin, it should be the first plugin available.
Configure Settings
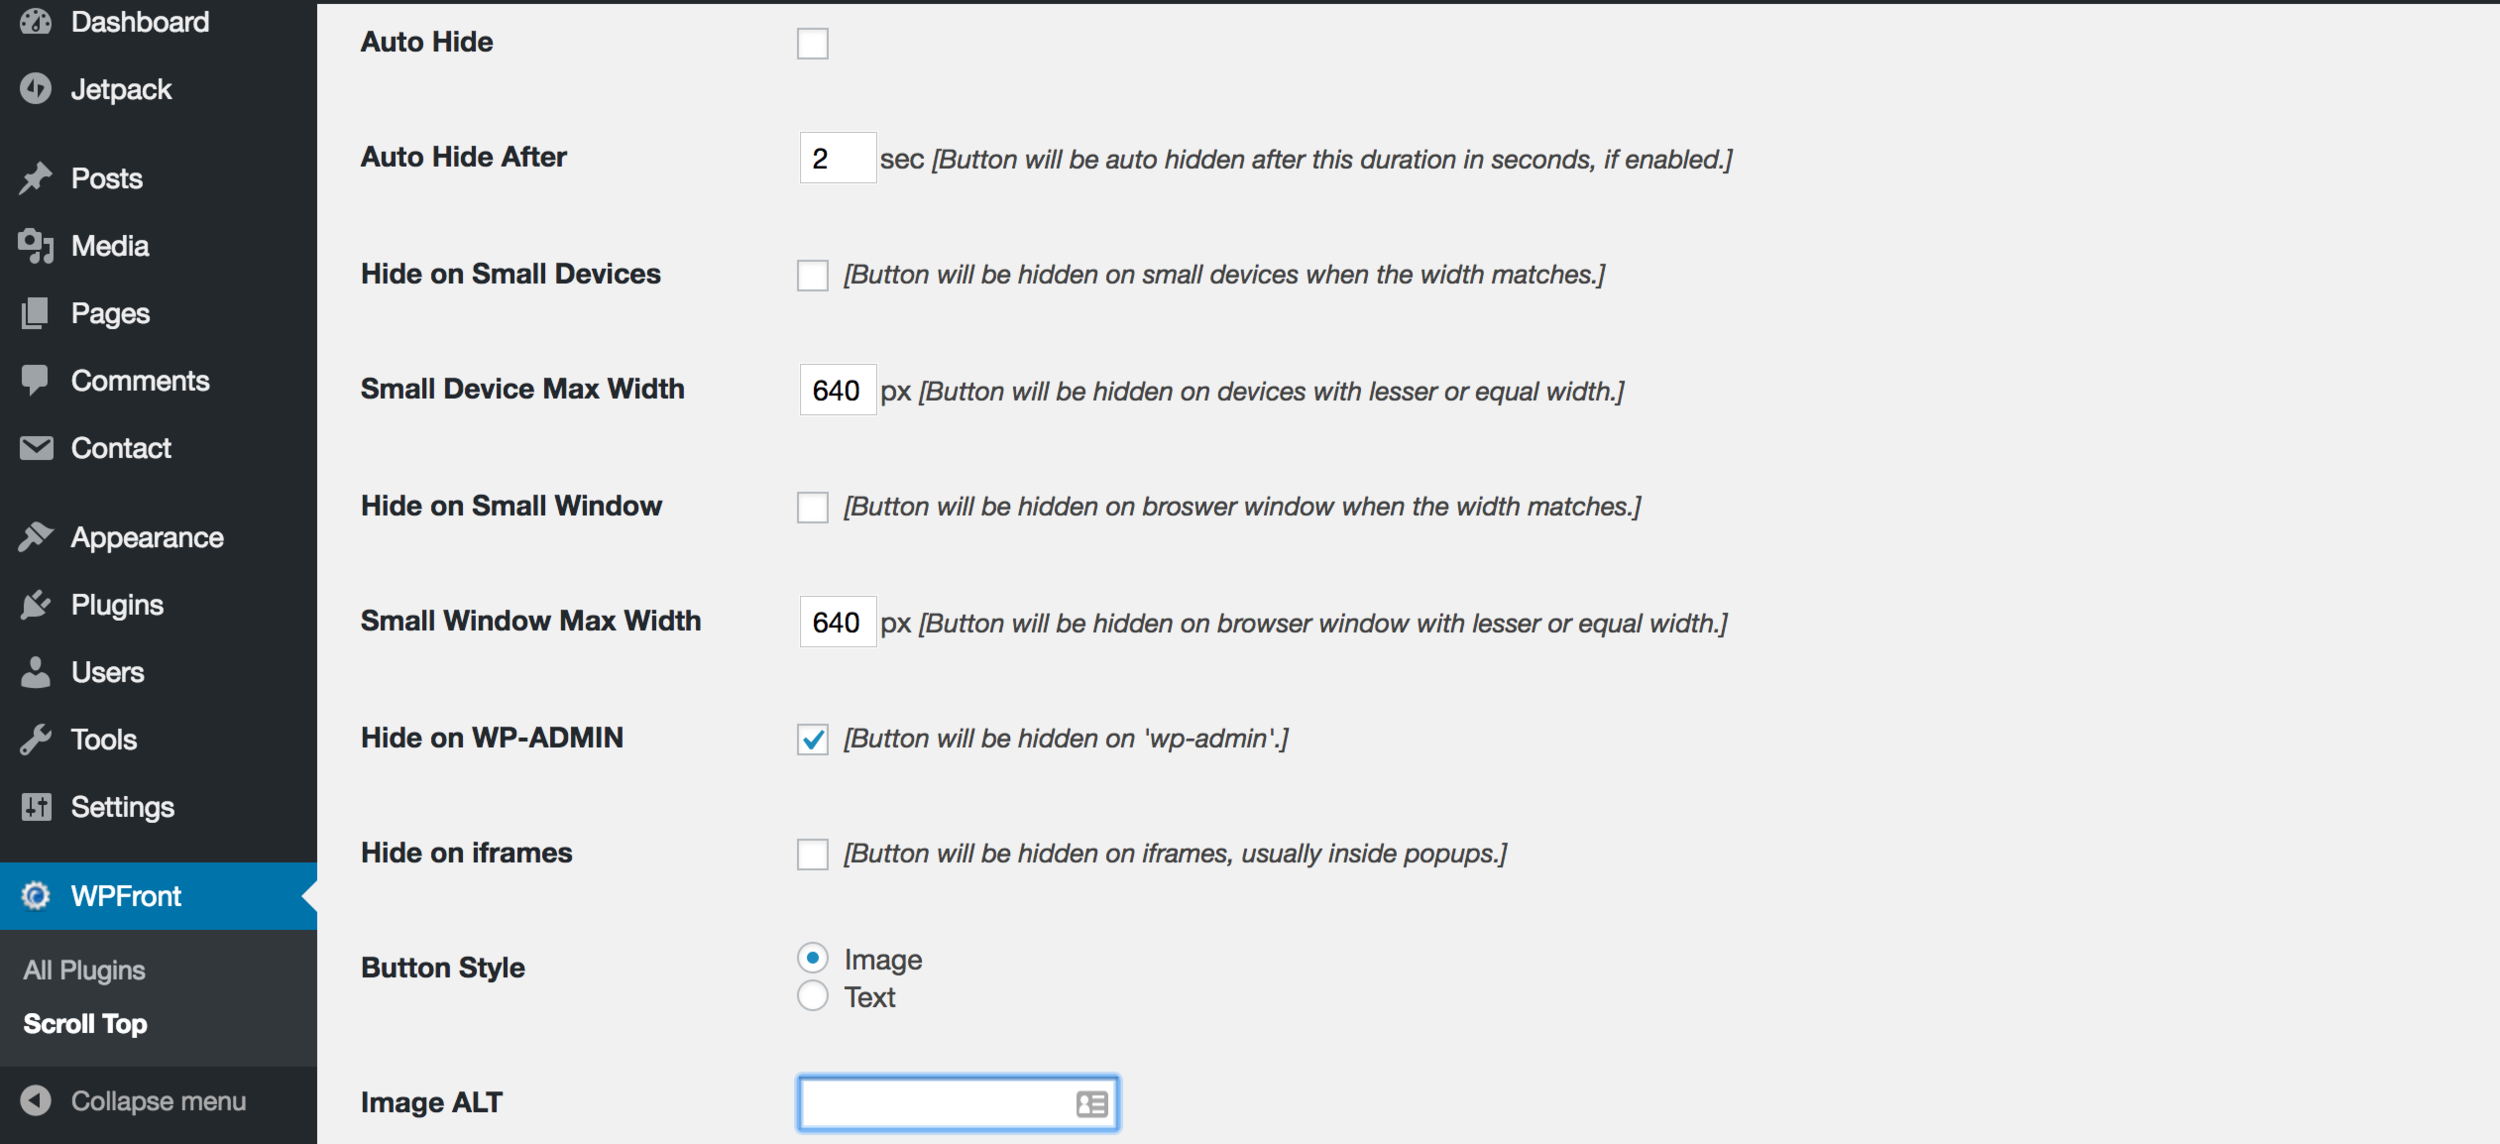
Next, you will want to configure the settings for the plugin, you can access them in WPFront > Scroll Top. There are several options so you will want to go through and find what works for you! I highlight a few settings we think are important below.
First I checked the JavaScript Async box, you'll see that this increases site performance and the plugin author recommends enabling it unless you run into conflicts. The next adjustment I make is setting the Scroll Offset to the number of pixels scrolled before the button appears, I set it to 25. In the second screenshot, I also checked the Hide on WP-ADMIN box because I don't need the button to appear in my dashboard.

Under the Location tab, I set the location to Bottom Right and left the other settings as their default. Next to Display on Pages, you can check which pages you want the button to appear, I want it on all of our pages so I left it as All Pages.

Upload Custom Back to Top Button
Here's the fun part! At the very bottom, you can upload a custom "back to top" button for your site - we've included free buttons at the end of this post! Upload your button to your Media library. From your dashboard go to Media > Add New and upload the image then copy the image's URL.

Go back to WPFront > Scroll Top and paste the image's URL in the Custom URL and save! Your image should now display as the back to top button on your site.

You're finished! Check out your new back to top button on your site now! You may decide to make other adjustments to the settings after uploading the image, you can easily adjust the size and placement in the above settings. Hopefully, you found this to be an easy and quick tutorial that will immediately help your audience navigate your site a bit easier.
We've included a few back to top buttons (for personal use only please) that you can download above! Also included are the Photoshop files so you can customize the colors as you like. You can download a free trial of Photoshop here! Are you using a back to top button? Share your link in the comments, I'd love to check it out!