Getting Started with Squarespace: A Step-by-Step Guide

In today's digital age, establishing a strong online presence is a vital step for individuals and businesses alike. Whether you're showcasing your portfolio, starting a blog, or launching an e-commerce store, having a professional website can open doors to new opportunities. This blog post is your starting point to crafting a stunning Squarespace website. It is also the kickoff post for our 5-part blog series “Mastering Squarespace”, that will run through the end of the year. We'll walk you through the process, step by step, so you can create an online space that truly reflects your vision.
Your Online Journey Begins
Step 1: Signing Up for a Squarespace Account
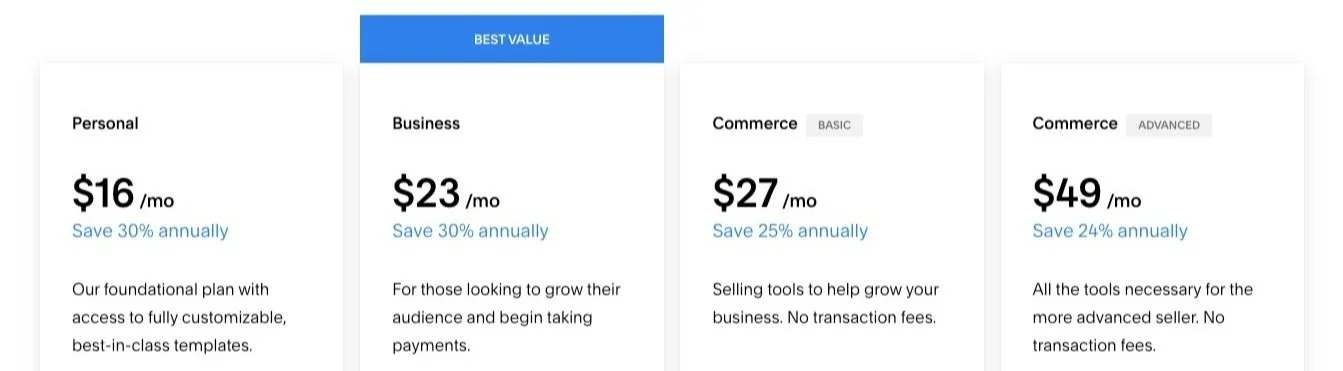
Though there are multiple website building platforms out there, we believe Squarespace is the truly best and we are assuming that you have chosen Squarespace since you are reading this post. For a comparison of Squarespace and WordPress, check out our previous post here. Squarespace has made the process for getting started with a website incredibly easily. Simply go to squarespace.com and click “Get Started.” Select a plan that suits your needs – Personal, Business, Commerce Basic or Commerce Advanced. Keep in mind that Squarespace does provide a 2-week free trial so that you can test it out before committing to a plan.
**Pro Tip – Purchase a premium Squarespace template through us and you will receive a 180-day free trial, so that you have plenty of time to design and build out your site before starting to pay.
Step 2: Choosing the Right Template
Once you have selected a plan, your next step is to select a template that resonates with your business type and desired functionality and user experience. Squarespace has 110 templates to choose from within their versions 7.0 and 7.1. Speaking of which, 7.1 is the latest version of Squarespace and we highly recommend that you start there, as it offers the latest in functionality and editing. You can read more about the differences between 7.0 and 7.1 here. We have over a dozen premium Squarespace templates to choose from that offer a wide variety styles for various small business industries (see below).


Step 3: Creating Your Site
With your template selected, it's time to start building out your site. You will be asked to provide a Site Title (don’t worry – you can change it at any time) and choose a domain. If you don't have a domain yet, you can purchase one directly through Squarespace or connect your existing domain. We highly recommend buying your domain through Squarespace if at all possible because it costs the same as other domain sellers and it then eliminates the extra step of having to connect a third-party domain to your site. This allows you to manage all website-related accounts and payments all under one umbrella.
Step 4: Navigating the Squarespace Interface
As you enter the Squarespace interface, you'll notice a user-friendly environment that empowers you to create without needing to know how to code. The main menu on the left is your hub for managing pages, design, commerce, settings and more.

The Website/Pages panel is where you'll organize your site's structure. (maybe gif from main menu to pages menu and scroll to see pages). Navigating to the Site Styles (or paint brush icon) allows you to tweak fonts, colors, and layouts effortlessly.
Step 5: Exploring the Pages Panel
Once in the pages panel, you can begin to start adding the pages and structure to your website. Whether you chose a free Squarespace template, a Station Seven premium template or another designer’s template, you will begin with a set of basic pages to get you started – home, about, services, shop, contact, etc. You will notice that there are two different sets of pages – Main Navigation and Not Linked. Any pages in the Main Navigation section will be linked and located on your main header navigation, while the Not Linked pages are those are either disabled, password-protected or are clickable from somewhere else on your website.
**Pro Tip – It is a web design best practice to include your home page Not Linked section, rather than as a Main Navigation item. Your logo/site title will be clickable and will take the user back to the home page, so there is no need to have it linked in the header.

Step 6: Adding Content to Your Pages and Customizing the Style
The heart of your website is the content. Squarespace’s drag-and-drop editing system called Fluid Engine makes it easy to add text, images, videos and more. You can experiment with different layouts and arrangements until your pages come alive. Once in edit mode on a page, simply select Add Block from the top left corner of any section to add the block type of your choice and then you can hover over that block to display the editing options within the block. You can also play with fonts, sizes, spacing and colors using the Site Styles (paint brush icon in the top right corner).

Step 7: Previewing and Publishing Your Site
Before your site goes live, take advantage of the Preview mode to see how it will appear to visitors. You can also toggle between desktop and mobile views to see how your device will be displayed on different devices. **Pro Tip – With Squarespace 7.1, you can edit the desktop and mobile views independently of each other and the changes will not impact the other view. (demo of preview mode and mobile vs. desktop). Navigate through your pages, test buttons, and ensure your content looks just right. Once you're satisfied, hit that "Publish" button! Your website is now accessible to the world. (insert demo of where to find publish button)

Not Too Bad, Right?
Congratulations! You've taken the first steps in crafting a Squarespace website that reflects your unique style and purpose. Your website is a canvas, and the possibilities are endless. In the upcoming weeks, we'll delve deeper into Squarespace's features and offer tips to take your website to the next level. Next week we will explore in further detail how to select the ideal template for your Squarespace site and provide some resources on where to look.
Join Us on the Journey
Ready to explore more Squarespace magic? Subscribe to our newsletter to receive weekly tips, insights, and tutorials to make the most of your Squarespace experience. Whether you're new to web design or a seasoned pro, we are here to support you in your journey.